
Access data from applications
You can easily access your data tables stored in the Scientific Data Warehouse (SDW) from either in-Nuvolos applications or external, non-Nuvolos applications.
Accessing data from applications running in Nuvolos
Currently, data access from Nuvolos is supported in the following applications: Python (Spyder, JupyterLab and VS Code), RStudio, Matlab and Stata.
Accessing data tables from Python in Nuvolos
If you want to use Nuvolos-hosted Python (via JupyterLab or Spyder), the data access will be simple:
Make sure you have the data available.
Run your application.
Inside your app, you will need to use the
nuvolos-odbcPython library developed by Alphacruncher, which is pre-installed in the Jupyter application.
Usage example:
from nuvolos import get_connection
import pandas as pd

con = get_connection()
df = pd.read_sql("SELECT * FROM table", con=con)
Stopping queries from Python
Please refer to the cancelling queries section for the available SQL commands. You can execute them as
df = pd.read_sql("<SQL_COMMAND>", con=con)Upgade instructions for nuvolos-odbc
You can use pip to upgrade nuvolos-odbc in existing applications:
pip install --upgrade nuvolos-odbcAccessing data tables from R in Nuvolos
If you want to use Nuvolos-hosted R (via RStudio), the data access will be simple:
Make sure you have the data available.
Run your application.
Inside RStudio, you will need to use the r-connector developed by Alphacruncher.
Usage example:
con <- nuvolos::get_connection()
result_data <- dbGetQuery(con,"SELECT * FROM table LIMIT 10")
Stopping queries from R
Please refer to the cancelling queries section for the available SQL commands. You can execute them as
result_data <- dbGetQuery(con,"<SQL_COMMAND>")Accessing data tables from Stata in Nuvolos
If you want to use Nuvolos-hosted Stata, the data access is greatly simplified. Nuvolos has its own sysprofile.do that automatically sets you up with access parameters. Stata communicates with the database using odbc , so you will need to issue the following command to load the query:
odbc load, exec(`"SELECT * FROM "table" LIMIT 10"') connectionstring($conn_str)Stopping queries from Stata
Please refer to the cancelling queries section for the available SQL commands. You can execute them as
odbc load, exec(`"<SQL_COMMAND>"') connectionstring($conn_str)Accessing data tables from Matlab in Nuvolos
First test your query in the Tables view of your space (or create a new query by using our query builder form). Then select the option Run from application > Matlab when looking at the query results preview to see the instructions on executing the given query inside Matlab on Nuvolos.
We suggest using the select statement of Matlab as it provides results in the table data type. For example:
conn = get_connection();
result_data = select(conn,'SELECT * FROM TABLE_NAME LIMIT 10');
In this example, result_data will be of the table type, and thus column names will be also available for the programmer as part of the return data structure.
Accessing data tables from external, non-Nuvolos applications
Connecting with R
First, please install the Nuvolos r-connector package developed for Nuvolos:
options(repos = "https://cran.rstudio.com")
install.packages("remotes")
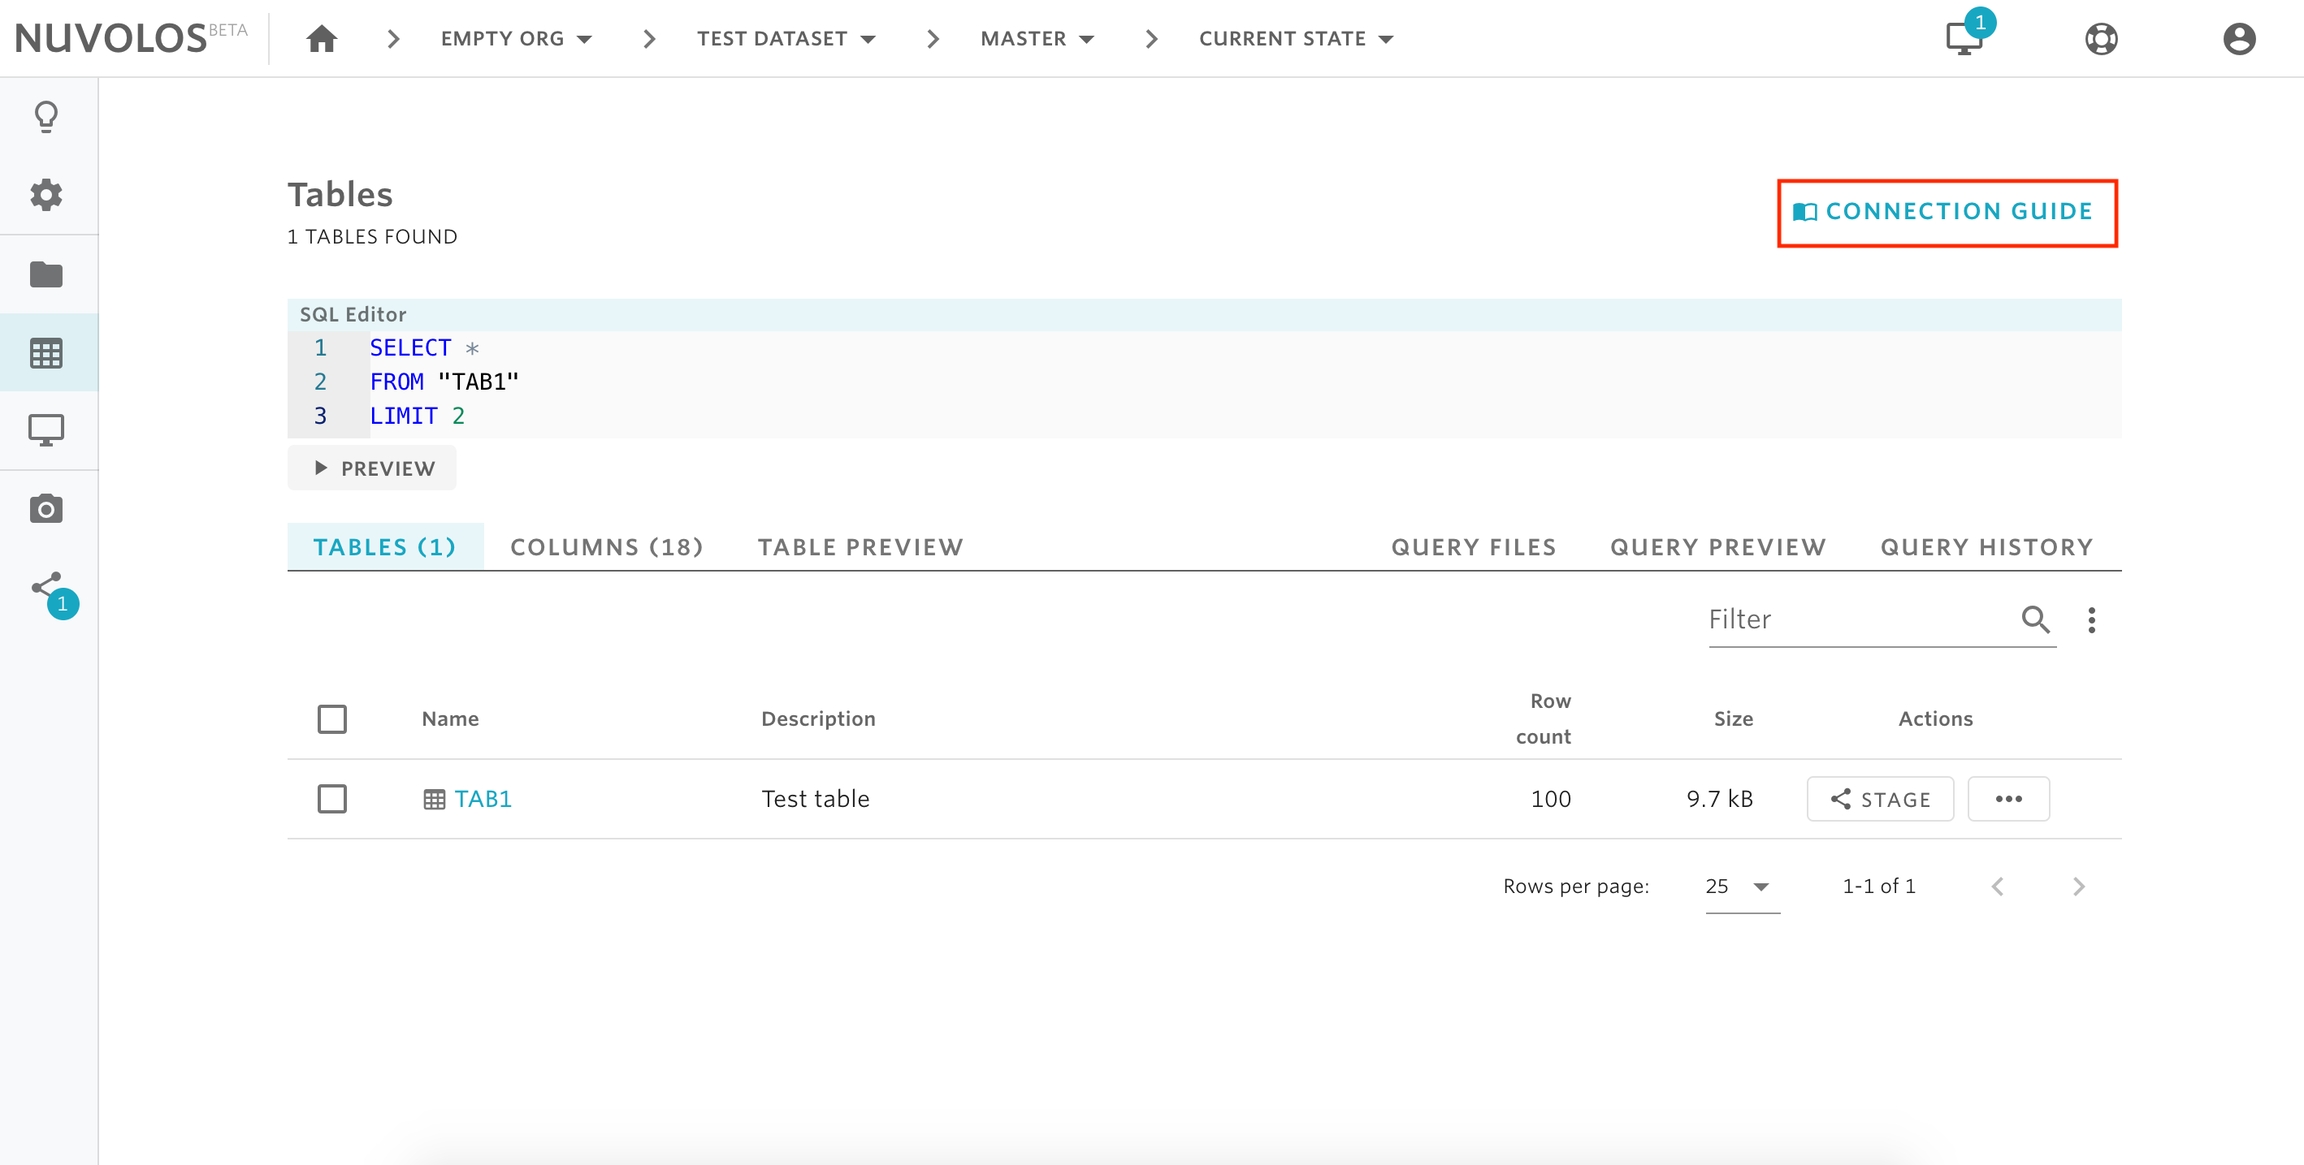
remotes::install_github("nuvolos-cloud/r-connector")Next, obtain access tokens and database/schema names from the Connection Guide on the Nuvolos Tables interface of the instance you wish to access:
Finally, pass the SQL statement, the database name and schema name to theread_sql() function:
result_data <- nuvolos::read_sql("SELECT * FROM \"TABLE\" LIMIT 10", dbname = "my_database", schemaname= "my_schema")Attention: you need to follow the quotation approach as the example code. If the table name is case insensitive, it can be referred as table or \"TABLE\". If the table name is case sensitive (containing upper-and lowercase letters or special characters), quotation is needed. For example: \"Table\".
Credentials: When you connect to the Nuvolos database for the first time, it will ask for your credentials. Check "Remember with keyring" box to avoid your future input. You can find your credentials following the connection guide. You don't need to write your credentials explicitly in your scripts, and the connector can safely access your token during the connection process.

In case you need to re-input your credentials, please execute the command below in R's console.
nuvolos::input_nuvolos_credential()Stopping queries from R
Please refer to the cancelling queries section for the available SQL commands. You can execute them as
result_data <- novolos::execute("<SQL_COMMAND>", dbname = "my_database", schemaname= "my_schema")Connecting with Python
First, install the nuvolos package developed for Nuvolos:
pip install --upgrade nuvolosNext, obtain access tokens and database/schema names from the Connection Guide on the Nuvolos Tables interface of the instance you wish to access:

Finally, pass the database and schema names specified in the Connection Guide to the get_connection() function:
from nuvolos import get_connection
import pandas as pd

con = get_connection(dbname = "dbname", schemaname="schemaname")
df = pd.read_sql("SELECT * FROM table", con=con)Credentials: When you connect to the Nuvolos database for the first time, it will ask for your credentials. You can find your credentials following the connection guide. You don't need to write your credentials explicitly in your scripts, and the connector can safely access your token during the connection process.

This will trigger the request to access your credential if it is the first time to access the Nuvolos database. Please input your local computer's password to allow the Python connector to read your Nuvolos credential.

In case you need to re-input your credentials, please execute the command below in Python's console.
from nuvolos import input_nuvolos_credential
input_nuvolos_credential()
Stopping queries from Python
Please refer to the cancelling queries section for the available SQL commands. You can execute them as
df = pd.read_sql("<SQL_COMMAND>", con=con)Special Notes for Win10
If you meet the error below:
RuntimeError: The current Numpy installation (...) fails to pass a sanity check due to a bug in the windows runtime...Please install an older version of NumPy from a terminal to solve this. It is a temporary solution specifically for windows 10.
pip install numpy==1.19.3Connecting with Stata
Accessing data from out-of-Nuvolos Stata applications consists of the following steps:
Install the Snowflake ODBC driver.
Obtain access tokens and database/schema names from the Connection Guide on the Nuvolos tables interface.
Establish a connection.
To set up your access parameters, issue the following commands. These have to be issued only once. The values for username and snowflake_access_token can be obtained following these instructions, and for database_name and schema_name, follow instructions here.
set odbcmgr unixodbc
global user "<username>"
global dbpwd "<snowflake_access_token>"
global dbpath_db `"<database_name>"'
global dbpath_schema `"<schema_name>"'
global conn_str `"DRIVER=SnowflakeDSIIDriver;SERVER=alphacruncher.eu-central-1.snowflakecomputing.com;DATABASE=$dbpath_db;SCHEMA=$dbpath_schema;UID=$user;PWD=$dbpwd"'
You can then access data similar to if you were using Nuvolos:
odbc load, exec(`"SELECT * FROM "table" LIMIT 10"') connectionstring($conn_str)Stopping queries from Stata
Please refer to the cancelling queries section for the available SQL commands. You can execute them as
odbc load, exec(`"<SQL_COMMAND>"') connectionstring($conn_str)Connecting with Matlab
First, please download and install the nuvolos toolbox developed for Nuvolos. You can also click "Get Add-ons", search "nuvolos" in the Matlab Add-on Explorer, and then “Add" in your toolbox.
Next, obtain access tokens and database/schema names from the Connection Guide on the Nuvolos Tables interface of the instance you wish to access:
Finally, pass the database and schema names specified in the Connection Guide to the get_connection() function:
conn = get_connection("dbname", "schemaname");
dataset = select(conn, "SELECT * FROM my_table");
For your credential's safety consideration, the Matlab connector will display the login dialog for the first time connecting to the Nuvolos database. Please find your credentials following the Connection Guide.

If you need to correct or change your credential, you can use the command below to input your credentials again.
create_credential(true)Connecting with Excel
For both Windows and Mac OS, please first install the Snowflake ODBC database driver for your platform, which is required to access the Nuvolos database service. You only need to satisfy the prerequisites and finish the ODBC driver installation (first step). You don't need to further configure and test the driver.
Windows
1. After installation of ODBC driver, please download the "Excelerator" package to local and unzip it into a local folder.

2. In the Windows File Explorer, navigate to the download location and right-click theSnowflakeExcelAddin.xlam file, click Properties, and tick "Unblock":

3. Open Excel. The add-in needs to be installed before it can be used:
Navigate to the add-in management window following "File""Option""Add-ins" "Go...".
Click the "Browse" button and navigate to the folder with the unzipped "Excelerator" package.
Choose the file
SnowflakeExcelAddin.xlamfile, click "OK"
For more detailed Excel add-in installation and management, please refer to this guide.
4. You can find the installed "Excelerator" add-in on the Home tab of the Ribbon.

5. Click the "connect" button to open the connection window:

6. Under the "User & Password" authentication type, please enter the appropriate values "server URL", "User ID" and "Password" to login. You can find the required access tokens and database/schema names from the Connection Guide on the "Tables" page of your Nuvolos space. Note: "Hostname" is the "server URL".
7. Click the "Query" button in the add-in. It shows the SQL execution window to query data. Please select the target "Database", "Schema" first, then the add-in will load all the available tables in "Table". The default is to query all columns unless the user click "Choose" to select a few target columns only. After entering the SQL command in the window below and clicking "Execute", the results will be inserted as a table to the active Excel sheet.
Attention: the SQL command must quote the table as the way of "database-name"."schema-name"."table-name".

Uploading Data
Table data can be updated or a new table can be created with sheet data using the Excelator add-in.
To upload data to Nuvolos, please perform the following steps:
Click on the cell of the first row and the first column of the data you wish to upload.
Click "Define Data Types" on the Home ribbon. This will add a row above the first row, where you will need to select the appropriate data types for the data columns you wish to upload. Unfortunately, the Add-In cannot automatically infer the data types for the columns:

3. Once you have the data types selected, click "Upload":

4. Select the upload action to be taken: An existing table can be updated, appended to, or replaced with the data in the sheet. Alternatively, you can tick "Create new table then upload", then enter the name of the new table. Click "Upload" to upload your data.
Mac OS
After installation of the ODBC driver, please open a terminal and use the command below to copy all the folders and files created from downloading the Snowflake ODBC driver (typically the
/opt/snowflake/path) to the/Library/ODBC/ODBCDataSourcesfolder:~$ sudo cp -r /opt/snowflake/ /Library/ODBC/ODBCDataSourcesThe user has to manually update the Snowflake ODBC Driver's file at
/Library/ODBC/ODBCDataSources/snowflakeodbc/lib/universal/simba.snowflake.ini. After navigate and open this file, please change two lines below in the file to remap the new locations of its associated files:
ErrorMessagesPath = /Library/ODBC/ODBCDataSources/snowflakeodbc/ErrorMessages
CABundleFile = /Library/ODBC/ODBCDataSources/snowflakeodbc/lib/universal/cacert.pem
After the changes, the file should look like below, and please save the file.

3. Run the command below to open the application with administrator rights, otherwise, it will show "General installer error" in the later stage.
sudo /Applications/iODBC/iODBC\ Administrator64.app/Contents/MacOS/iODBC\ Administrator64
4. Click on the ODBC Drivers tab, and check if the Snowflake driver is already present. If it is, verify that the file path is /Library/ODBC/ODBCDataSources/snowflakeodbc/lib/universal/Snowflake.dylib. If it is not, click Add a driver.

In the field Description of the driver, type a name for the driver, such as "SnowflakeODBC".
In the field Driver file name, click Browse and navigate to the driver file
libSnowflake.dylibin the/Library/ODBC/ODBCDataSources/snowflakeodbc/lib/universal/folder.Click Ok.
Under the System DSN tab, click Add. A dialog opens.
Select the Snowflake driver you added. The DSN configuration window opens.

Enter a unique DSN name for your Snowflake connection, such as "SnowflakeExcel".
In the keyword section, click the "+" button at the left bottom to add keyword and value pairs of "server", "port", "database" and "schema". The user can obtain these values and access tokens from the Connection Guide on the interface of the Nuvolos "Tables".
Click OK to save settings.
5. Launch Microsoft Excel. Go to Data > New Database Query > From Database.


6. With the iODBC Data Source Chooser window open, switch to the System DSN tab and select the DSN created, and hit OK.

7. Enter your Snowflake username and password. The user can obtain access tokens from the Connection Guide on the interface of the Nuvolos "Tables".
8. The Microsoft Query window opens.
Type the desired SQL statement, and click Run.
Click Return Data to import the results to the spreadsheet.
Attention: the SQL command must quote the table as the way of "database-name"."schema-name"."table-name".
The user can obtain the database, schema, and table names from the Connection Guide on the interface of the Nuvolos "Tables".

Canceling queries
Running queries can be listed and (selectively) canceled using SQL statements.
List running queries
You can check how many running queries you have with the command below. You'll need to substitute your Nuvolos username into the <USERNAME> placeholder. You can find out your Nuvolos username in the Profile page on the Nuvolos Web interface.
SELECT USER_NAME, QUERY_ID, SESSION_ID, QUERY_TEXT, START_TIME FROM TABLE(INFORMATION_SCHEMA.QUERY_HISTORY_BY_USER(USER_NAME=>'<USERNAME>')) WHERE EXECUTION_STATUS = 'RUNNING'Cancel a particular query
Once you know the query id, you can cancel a specific query with
SELECT SYSTEM$CANCEL_QUERY('<QUERY_ID>')Cancel all running queries
Alternatively, you can cancel all your currently running queries with the command
ALTER USER <USERNAME> ABORT ALL QUERIESExporting big data
If your work requires frequently reading a large amount of tabular data from Nuvolos tables, in cluster batch jobs, for example, or you wish to export the result of a query that exceeds 1 million rows, it is recommended to retrieve the data locally as Parquet compressed data files.
Parquet files offer high data compression and significantly faster read times compared to CSV files and are supported by most scientific applications (Matlab, Pandas, R).
Export steps
The general steps that need to be performed are the following:
Create a staging area in the database where the database engine will export the query results as a Parquet file,
Run the query and export the data,
Retrieve the exported data from the staging area in the database,
Drop the remote staging area.
This translates to the following SQL, assuming the compressed data will be less, than 5GB:
CREATE OR REPLACE FILE FORMAT PARQUET_FORMAT TYPE = PARQUET COMPRESSION = SNAPPY;
CREATE OR REPLACE STAGE PARQUET_STAGE FILE_FORMAT=PARQUET_FORMAT;

COPY INTO @PARQUET_STAGE/orders.parquet
FROM (SELECT
    O_ORDERKEY,
    O_CUSTKEY,
    O_TOTALPRICE,
    O_ORDERDATE,
    O_ORDERPRIORITY,
    O_CLERK,
    O_SHIPPRIORITY,
    O_COMMENT
FROM ORDERS)
HEADER = TRUE
OVERWRITE = TRUE
SINGLE = TRUE
MAX_FILE_SIZE = 5000000000;


GET @PARQUET_STAGE file:///files/query_results/ PATTERN='orders.parquet' PARALLEL=4;

DROP STAGE PARQUET_STAGE;
DROP FILE FORMAT PARQUET_FORMAT;
If you anticipate that the result set of your query would be larger than 5GB compressed (~50M rows), you will need to split the exported data into multiple Parquet files. This way the export will be faster, however, as the database engine can parallelize the data export:
CREATE OR REPLACE FILE FORMAT PARQUET_FORMAT TYPE = PARQUET COMPRESSION = SNAPPY;
CREATE OR REPLACE STAGE PARQUET_STAGE FILE_FORMAT=PARQUET_FORMAT;

COPY INTO @PARQUET_STAGE/orders_
FROM (SELECT
    O_ORDERKEY,
    O_CUSTKEY,
    O_TOTALPRICE,
    O_ORDERDATE,
    O_ORDERPRIORITY,
    O_CLERK,
    O_SHIPPRIORITY,
    O_COMMENT
FROM ORDERS)
HEADER = TRUE
OVERWRITE = TRUE
SINGLE = FALSE
MAX_FILE_SIZE = 5000000000;


GET @PARQUET_STAGE file:///files/query_results/ PATTERN='orders_*' PARALLEL=4;

DROP STAGE PARQUET_STAGE;
DROP FILE FORMAT PARQUET_FORMAT;
Matlab example
You can download data as Parquet files and read them with Matlab as the following example demonstrates, which retrieves and loads the ORDERS table containing 15 million records.
Please note that Matlab requires integer columns to be explicitly cast to an integer field in order to have the logical data type in the Parquet file be INT. Each field in a Parquet file has a physical type (INT64, DOUBLE, BYTE, etc) and a logical type telling the processing application how to interpret the data saved in the field. Please refer to the Matlab documentation on the supported Parquet logical types.
conn = get_connection();
execute(conn, 'CREATE OR REPLACE FILE FORMAT PARQUET_FORMAT TYPE = PARQUET COMPRESSION = SNAPPY;');
execute(conn, 'CREATE OR REPLACE STAGE PARQUET_STAGE FILE_FORMAT=PARQUET_FORMAT;');
execute(conn, sprintf([ ...
'COPY INTO @PARQUET_STAGE/orders.parquet '...
'FROM FROM (SELECT  '...
'    O_ORDERKEY::INT,  '...
'    O_CUSTKEY::INT,  '...
'    O_TOTALPRICE::DOUBLE,  '...
'    O_ORDERDATE,  '...
'    O_ORDERPRIORITY,  '...
'    O_CLERK,  '...
'    O_SHIPPRIORITY::INT,  '...
'    O_COMMENT  '...
FROM ORDERS) '...
'HEADER = TRUE '...
'OVERWRITE = TRUE '...
'SINGLE = TRUE '...
'MAX_FILE_SIZE = 5000000000; '...
]));


try
    % This line will fail with an error currently, however, the file will be retrieved.
    execute(conn, 'GET @PARQUET_STAGE/orders.parquet file:///files/query_results/ PARALLEL=4 ;');
catch
    warning('Data has been retrieved');
end

% Please run these clean-up statements after the error.
execute(conn, 'DROP STAGE PARQUET_STAGE;');
execute(conn, 'DROP FILE FORMAT PARQUET_FORMAT;');

info = parquetinfo('/files/query_results/orders.parquet')
T = parquetread('/files/query_results/orders.parquet')Last updated
Was this helpful?